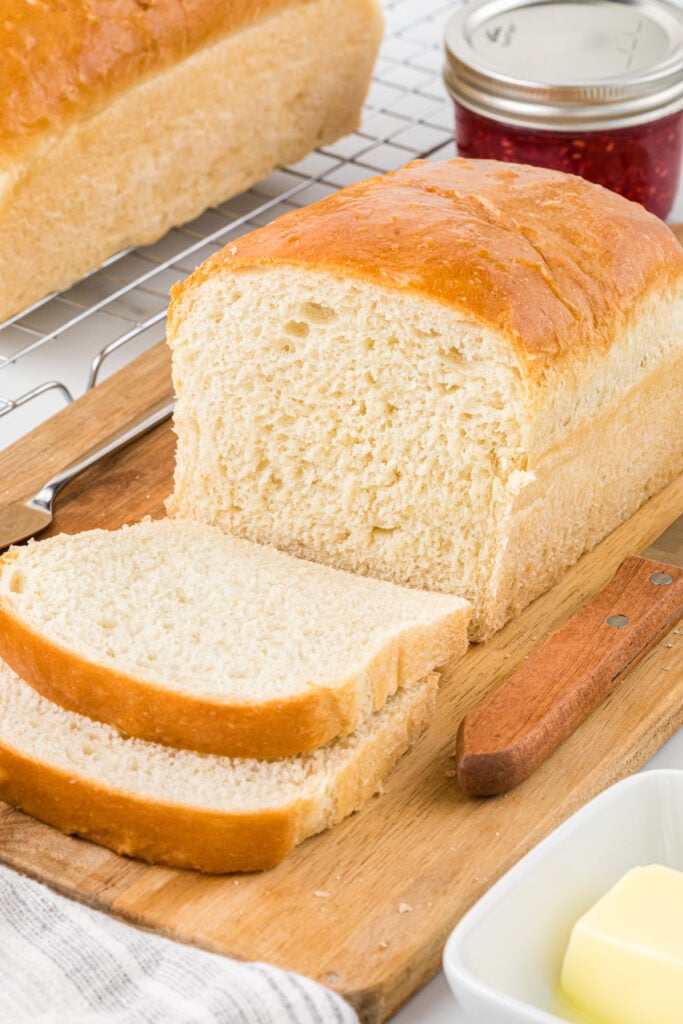
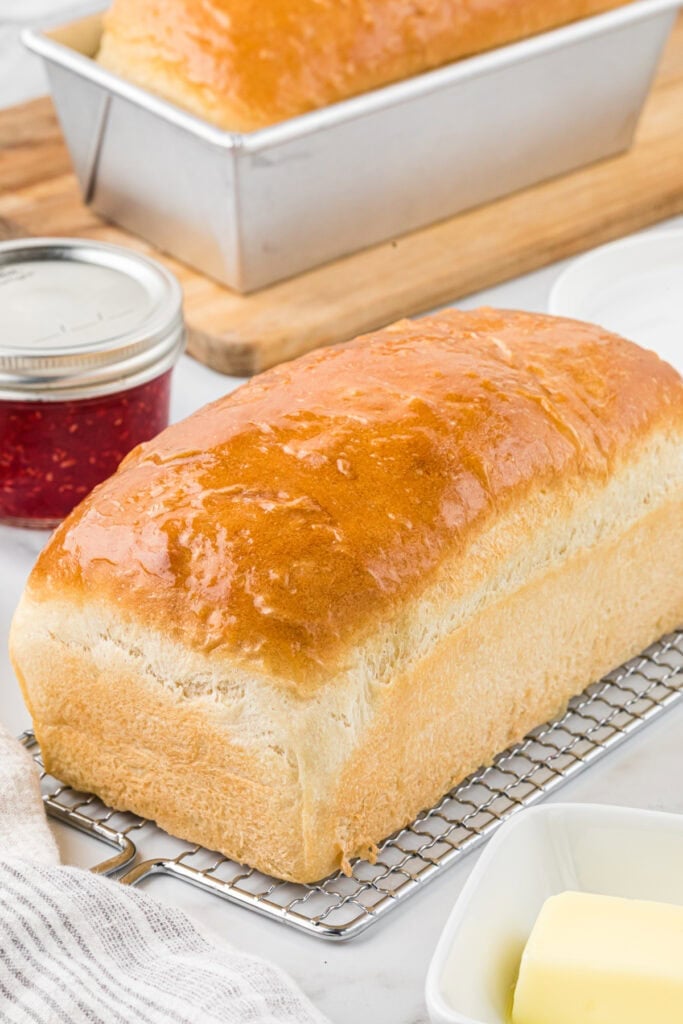
This soft, fluffy Homemade Sandwich Bread is absolutely the best white bread with bakery-style flavor, and a light texture that bakes up tall, soft, and golden. It is easy to make with a few pantry ingredients, and is perfect for toast, sandwiches, and snacking. We can’t get enough of it and love how it makes the day feel a little extra special with the smell and taste of homemade bread.
What we love about this Homemade Sandwich Bread Recipe
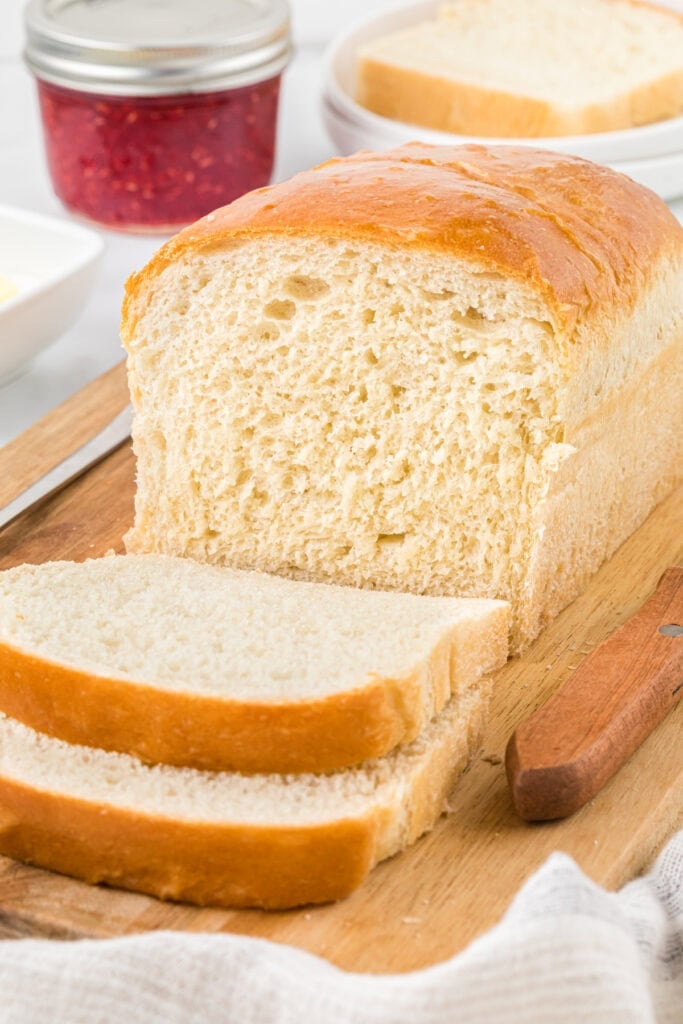
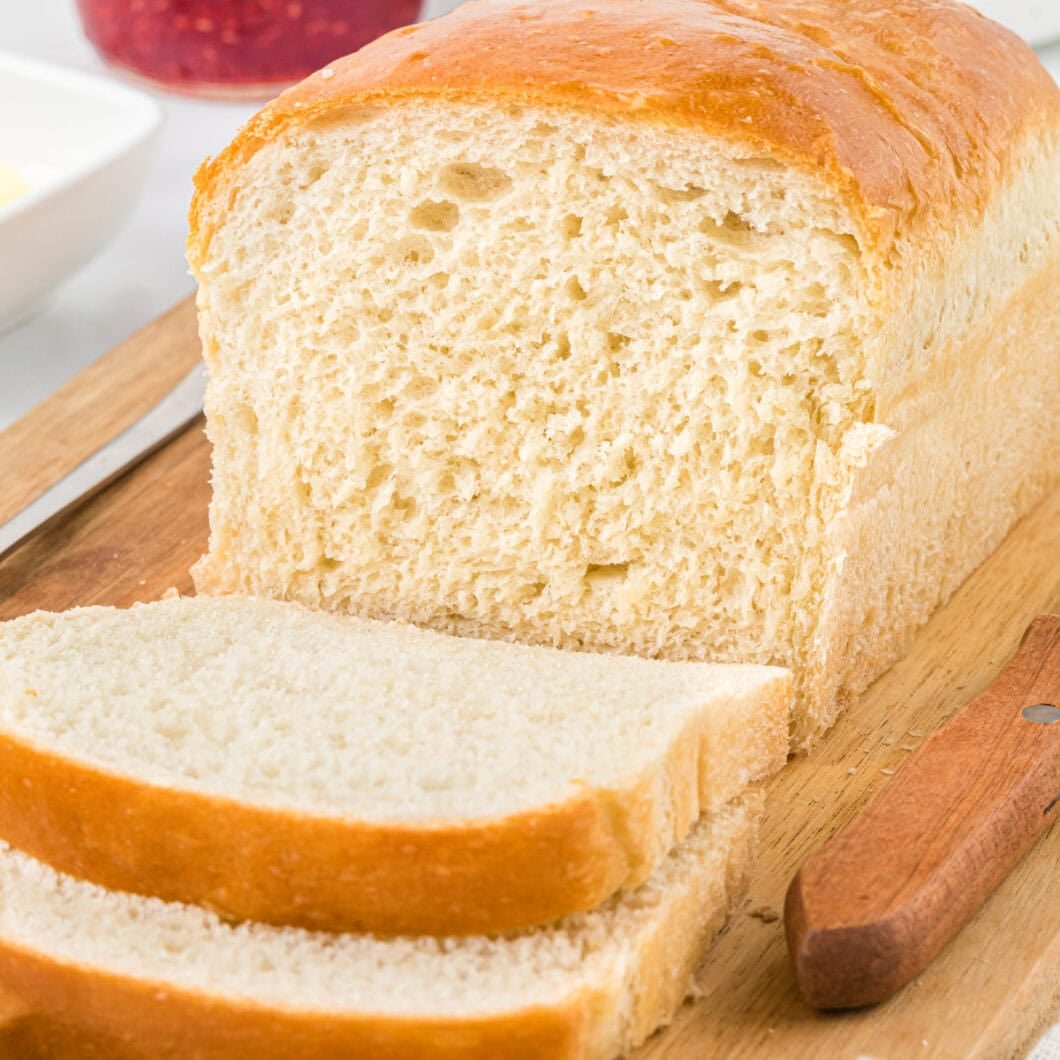
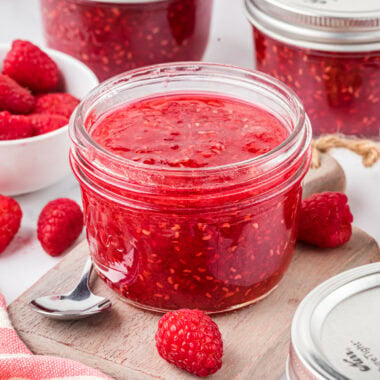
This Homemade Sandwich Bread is soft, fluffy, and irresistible. It has such a wonderful flavor and texture; it is an absolute family favorite. As soon as it is out of the oven, my kids are waiting for a slice. I love how a homemade bread day makes the house smell and feel a little special. We love this bread for snacking with butter, peanut butter, or especially with our homemade Simple Raspberry Jam. It makes great toast and sandwiches, and perfectly accompanies a meal.
The longest part of making bread is the time it takes the dough to rise. This recipe is simple, easy, only uses a few pantry ingredients, and the hands-on time is minimal. If you are new to baking with yeast, I’ve included some tips for using yeast in the notes at the bottom of the recipe.
Looking for other bread recipes? Try our Blueberry Buttermilk Muffins, our Big, Soft, Fluffy Dinner Rolls, our Buttermilk Banana Nut Bread, our Homemade Pretzel Bites and Pretzel Dogs, and our Lemon Zucchini Poppyseed Bread. Also, our favorite spread for this bread is our Simple Raspberry Jam.
What you need to make Homemade White Bread
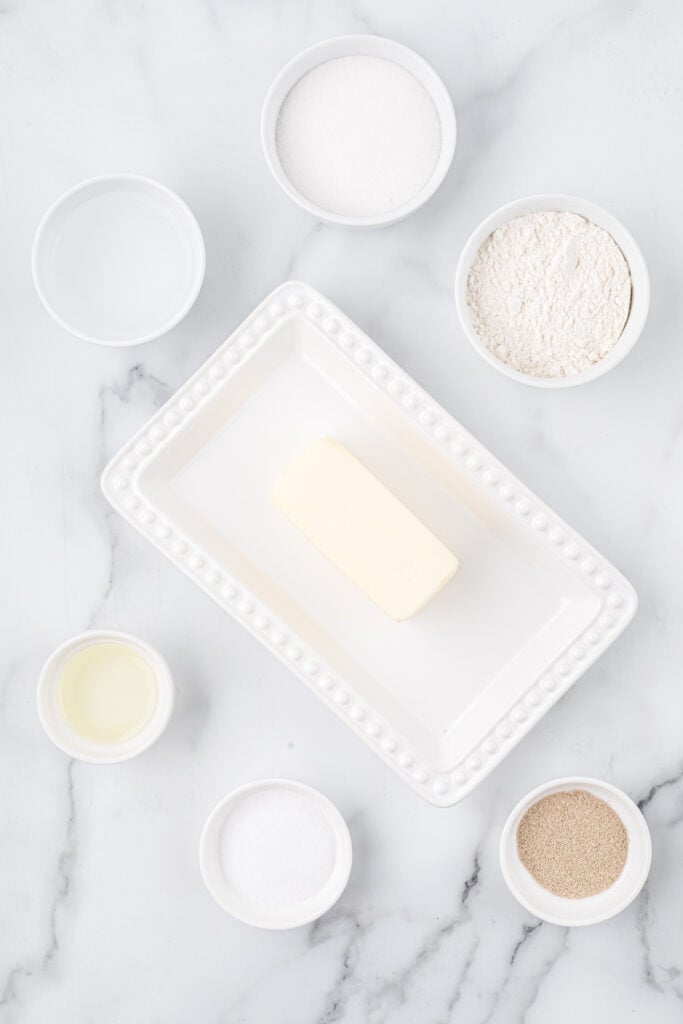
You will need the following ingredients:
- Warm water
- Granulated sugar
- Active dry yeast
- All-purpose flour
- Vegetable oil
- Salt
- Butter
Homemade White Bread Recipe Substitutions
I know what it’s like when you don’t have everything on hand, and the last thing you want to do is run to the store and pick something up. Here are a few ideas to substitute items on the ingredients list if needed:
- You can substitute milk for the water and butter for the oil. We have done this before. What results is a less chewy bread and a slightly denser bread. We prefer the texture and taste of the water and oil.
- You could use part wheat flour with the white flour, between 25 and 50%, however, wheat flour absorbs more water than white flour, so you would need to add more liquid (1-2 teaspoons per cup). You may also want to let the dough rest for 30 minutes before kneading. See “How to substitute whole wheat flour for white flour in baking” by King Arthur’s Baking Company for more information.
- You can substitute bread flour for the white flour, though the texture of the bread and dough will be slightly different. Also, because of the additional protein in bread flour, it absorbs a little more water, and you would need to add 1-2 tablespoons more water per cup of flour. See “How to substitute bread flour for white flour” by King Arthur’s Baking Company for more information.
- You can substitute honey for the sugar.
Step-by-step Instructions
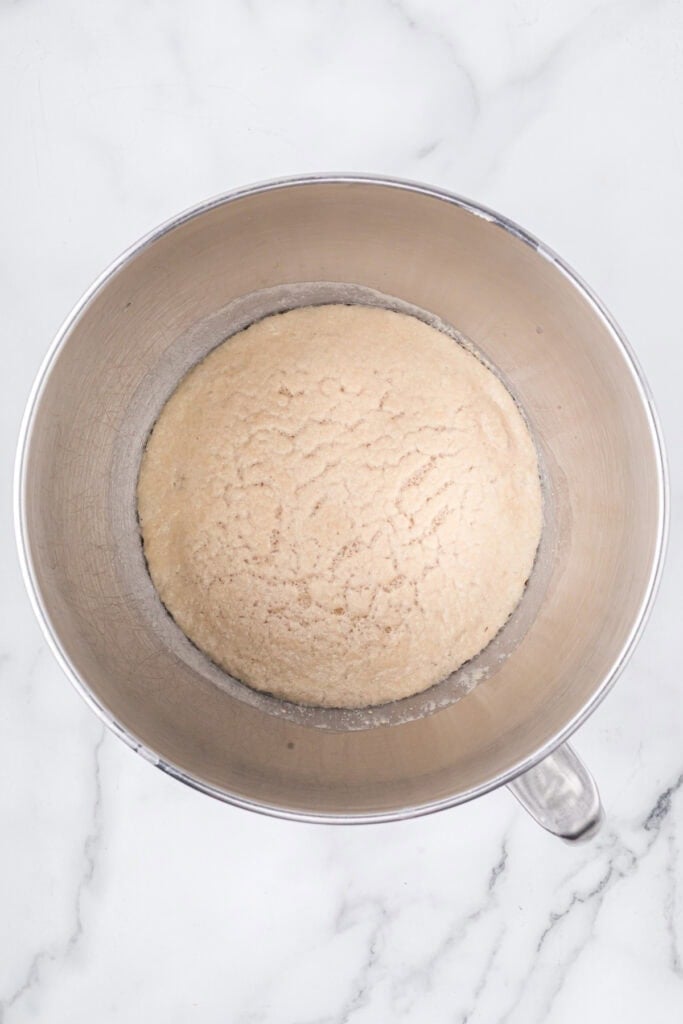
Step 1. In a large bowl of a stand mixer, pour the warm water, 1 tablespoon of the sugar, and the active dry yeast. Stir to mix to moisten the yeast granules. Let it sit for about 10 minutes for the yeast to bloom. It will rise and bubble.
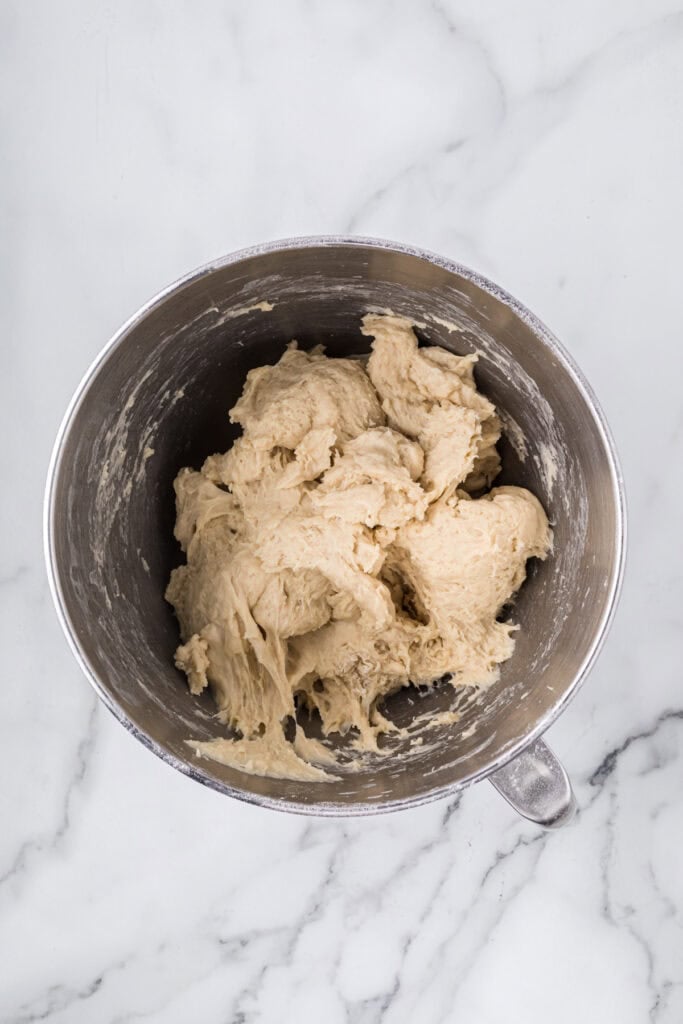
Step 2. Using the paddle attachment on the stand mixer, mix together the yeast mixture, the vegetable oil, the remaining 2 tablespoons of sugar, salt, and 3 cups of the flour on medium speed for one minute until ingredients are combined. Continue to mix, adding the flour ½ cup at a time until the dough starts to pull away from the bowl when mixing instead of sticking to the bowl.
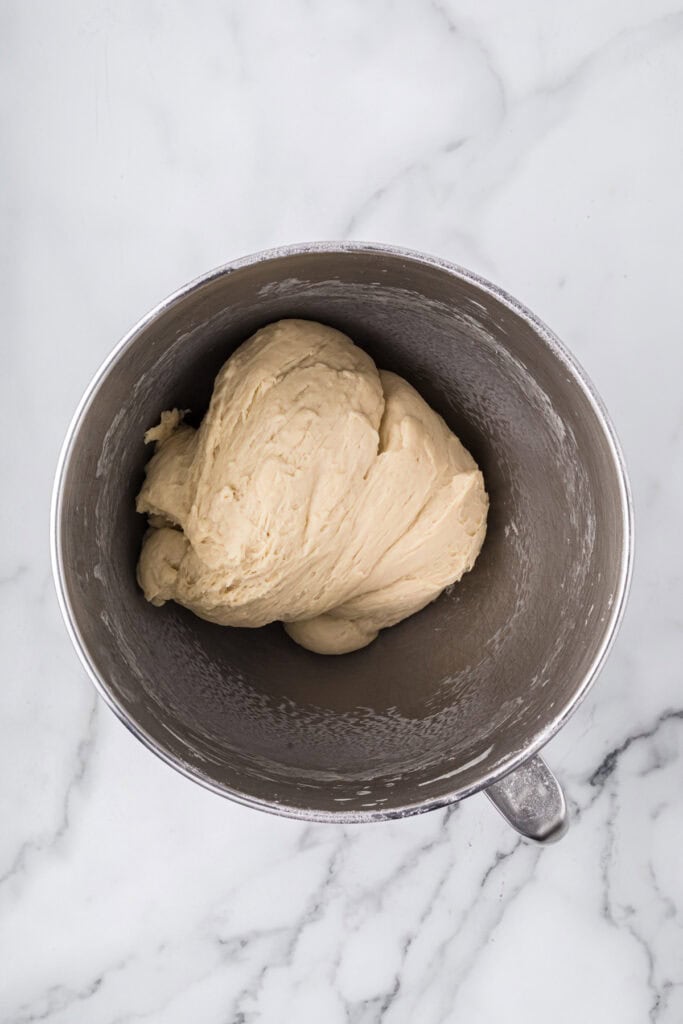
Step 3. Switch from the paddle attachment to the dough hook and knead the dough in the mixer on medium speed for 5 minutes (you can also knead by hand).
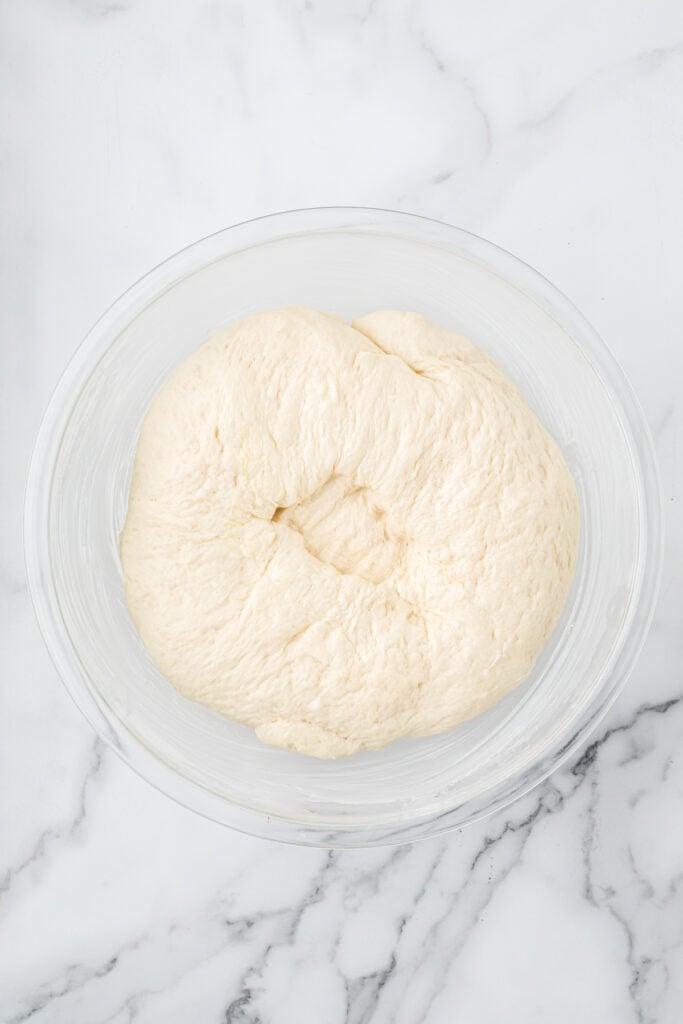
Step 4. Turn the dough into the prepared bowl, gently form it into a ball, and cover with lightly greased plastic wrap or a towel. Let the dough rise for 90 minutes, until doubled in size. Gently remove the covering, punch the dough down, and turn the dough onto a lightly floured surface.
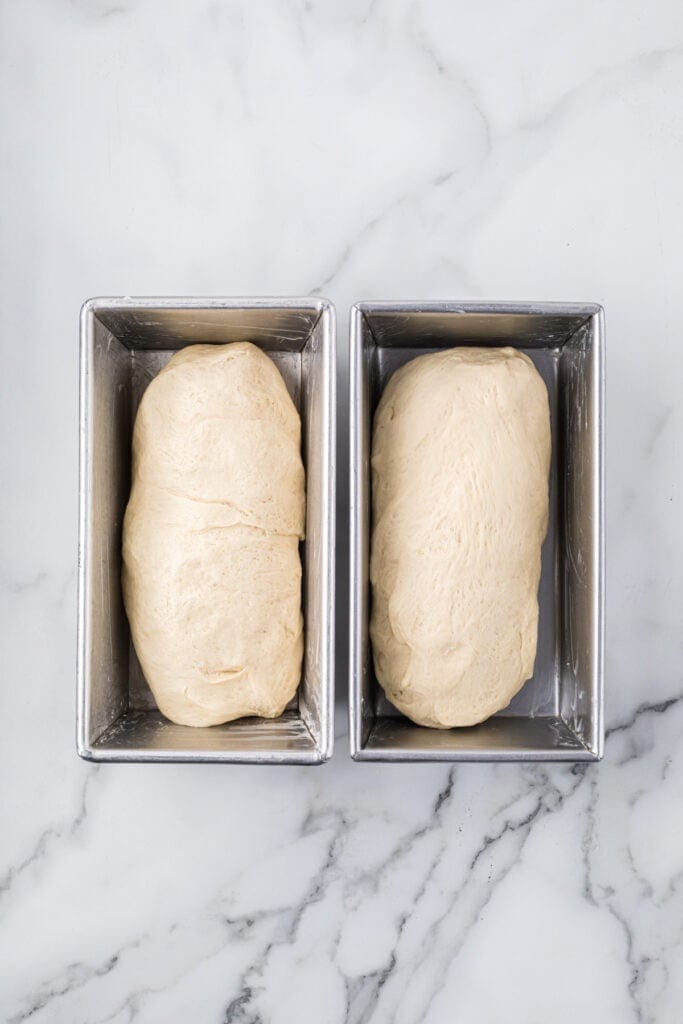
Step 5. Divide the dough in half (I like using a bench scraper to do this). Shape each half of the dough into a log, and place each one into the prepared loaf pans. Cover the loaves with a light kitchen towel and let rise again for 45 minutes. While the dough is rising, preheat the oven to 350 degrees Fahrenheit. The dough should be in a slight dome shape, with the dough risen about 1 inch above the rim of the pan when ready to bake.
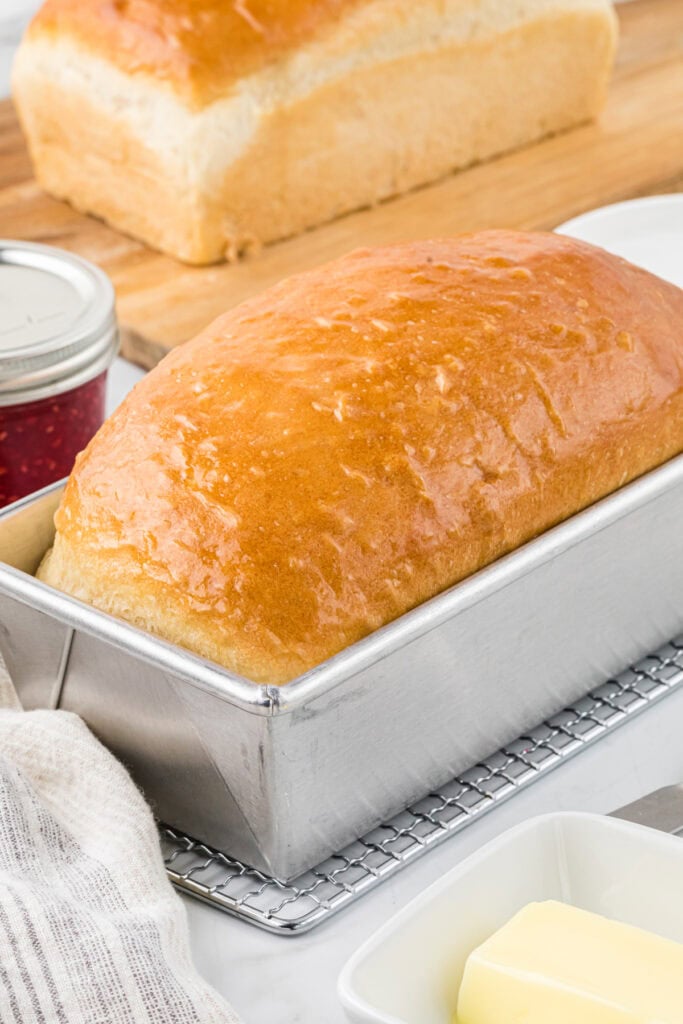
Step 6. Bake the bread for 30-35 minutes. The top will be slightly golden. Remove the bread from the oven and let it cool in the pan for 10 minutes, then run a thin knife between the bread and the edges of the pan to help it release. Transfer the loaves from the pans to a cooling rack and brush the top of the bread with the melted butter. Let cool on the rack for at least 15 minutes before slicing.
Tips

- It can take a little practice to make bread with yeast. See my notes section after the recipe for tips on how to be successful using yeast.
- I am a big fan of USA baking pans, and these 8 1/2 x 4 1/2 1 pound bread pans are great for baking bread. USA pans cook evenly, are high quality, and long-lasting. Aluminized steel is a great material for baking bread.
Frequently Asked Questions
| Can homemade bread be made in advance? |
| a. You can make the dough in advance by following the recipe instructions through step 6. Make the dough, let it rise, shape the dough into loaves, and place them in the bread pans. Wrap the loaves in plastic and then foil or an airtight bag, and freeze until the day before you want to bake them. Let the loaves thaw overnight in the fridge, let them come to room temperature, then proof the dough (the second rise) and bake. b. You can also bake the bread and freeze it, then thaw it at room temperature before use. (See the instructions for longer-term storage below.) To warm the bread slightly, unwrap the bread and place it in a 350-degree Fahrenheit oven for 10 minutes |
| How to store homemade sandwich bread? |
| a. Once the bread cools to room temperature, store it in an airtight bag or bread box for up to 2-4 days. Storing it while it is still warm will trap the steam and cause the bread to go soggy, and contribute to quicker mold growth. Putting it in the fridge will dry out the bread and make it go stale faster. b. For longer-term storage, I recommend freezing it. To freeze the bread, once the bread cools to room temperature, wrap it in plastic wrap and again in foil or in an airtight bag for up to 3 months for best quality. To serve, thaw the bread completely at room temperature, which should take 1-3 hours. To warm the bread slightly, place it in a 350-degree Fahrenheit oven for 10 minutes. You can also freeze the loaf in individual slices and store them with the same method if desired. Individual slices thaw to room temperature within an hour. |
Homemade Sandwich Bread
This soft, fluffy Homemade Sandwich Bread is absolutely the best white bread with bakery-style flavor, and a light texture that bakes up tall, soft, and golden. It is easy to make with a few pantry ingredients, and is perfect for toast, sandwiches, and snacking. We can’t get enough of it and love how it makes the day feel a little extra special with the smell and taste of homemade bread.
2
loaves30
minutes35
minutes2 hours
15 minutesIngredients
2 cups warm water (temperature should be between 100 degrees Fahrenheit and 110 degrees Fahrenheit)
3 tablespoons granulated sugar, divided
1 tablespoon active dry yeast
1/4 cup vegetable oil (or other neutral oil like canola)
2 teaspoons salt
4 1/2 -5 1/2 cups all-purpose flour
1 -2 tablespoons butter, melted
Directions
- Grease two 8 1/2 x 4 1/2 bread pans and a large bowl with butter, oil, or cooking spray.
- In a large bowl of a stand mixer, pour the warm water, 1 tablespoon of the sugar, and the active dry yeast. Stir to mix to moisten the yeast granules. Let it sit for about 10 minutes for the yeast to bloom. It will rise and bubble.
- Using the paddle attachment on the stand mixer, mix together the yeast mixture, the vegetable oil, the remaining 2 tablespoons of sugar, salt, and 3 cups of the flour on medium speed for one minute until ingredients are combined. Continue to mix, adding the flour ½ cup at a time until the dough starts to pull away from the bowl when mixing instead of sticking to the bowl.
- Switch from the paddle attachment to the dough hook and knead the dough in the mixer on medium speed for 5 minutes (you can also knead by hand).
- Turn the dough into the prepared bowl, gently form it into a ball, and cover with lightly greased plastic wrap or a towel. Let the dough rise for 90 minutes, until doubled in size.
- Gently remove the covering, punch the dough down, and turn the dough onto a lightly floured surface. Divide the dough in half (I like using a bench scraper to do this). Shape each half of the dough into a log, and place each one into the prepared loaf pans.
- Cover the loaves with a light kitchen towel and let rise again for 45 minutes. While the dough is rising, preheat the oven to 350 degrees Fahrenheit. The dough should be in a slight dome shape, with the dough risen about 1 inch above the rim of the pan when ready to bake.
- Bake the bread for 30-35 minutes. The top will be slightly golden. Remove the bread from the oven and let it cool in the pan for 10 minutes, then run a thin knife between the bread and the edges of the pan to help it release.
- Transfer the loaves from the pans to a cooling rack and brush the top of the bread with the melted butter. Let cool on the rack for at least 15 minutes before slicing.
Recipe Video
Notes
- Before baking with yeast, always make sure your yeast isn’t expired by checking the date on the package. Old yeast loses its potency.
- It’s important when baking with yeast to make sure the liquid is warm, with 100-110 degrees Fahrenheit being the ideal temperature for active dry yeast. Water that’s too hot will “kill” the yeast, but you need it warm enough to bloom. Don’t add salt with the yeast when it is blooming, or it will slow the growth of the yeast down. You’ll know the yeast is blooming if it bubbles and foams on top.
- The temperature and humidity of your kitchen will affect how fast the dough will rise. Keep the dough in a warm, draft-free place to rise. According to King Arthur Baking Company: “The longer dough rises (up to a point), the more flavor it develops. Conversely, dough that rises too quickly produces bread with flat flavor. Nail the sweet spot — warm enough to rise at a decent rate, yet cool enough to develop flavor — and you’re golden…Studies have shown that the optimum temperature for yeast to grow and flavor to develop is 75°F to 78°F”
- Always cover your dough with a towel or plastic wrap to prevent a skin from forming on the outside of the dough.


I was literally just saying I wanted to start making our own sandwich bread, and then you posted it! Thank you so much for this recipe it worked perfectly.
Thanks so much for the great feedback! We love this bread. The texture and taste is just so addictive, and we burn through these loaves.
This bread was so fluffy but easily sliceable. It’s the best sandwich bread ever!
I am so glad to hear that you enjoyed it! We love this bread, the taste and texture is just the best. Thanks for leaving your feedback!
I tried this sandwich bread recipe and it turned out so good! The bread was soft, fluffy, and perfect for sandwiches and toast. My daughter loved it so much!
That makes me happy to hear! We all love this bread and I am glad you enjoyed it too!
I’ve always been intimidated by making bread but your recipe and instructions made it so easy! It ended up being so perfect for toast in the mornings. Looking forward to making it again soon!
This makes me so happy to hear! We love this bread, and really, it’s just a a waiting game while it rises with very little hands on time. I’m so glad you enjoyed it, thanks for the great feedback!