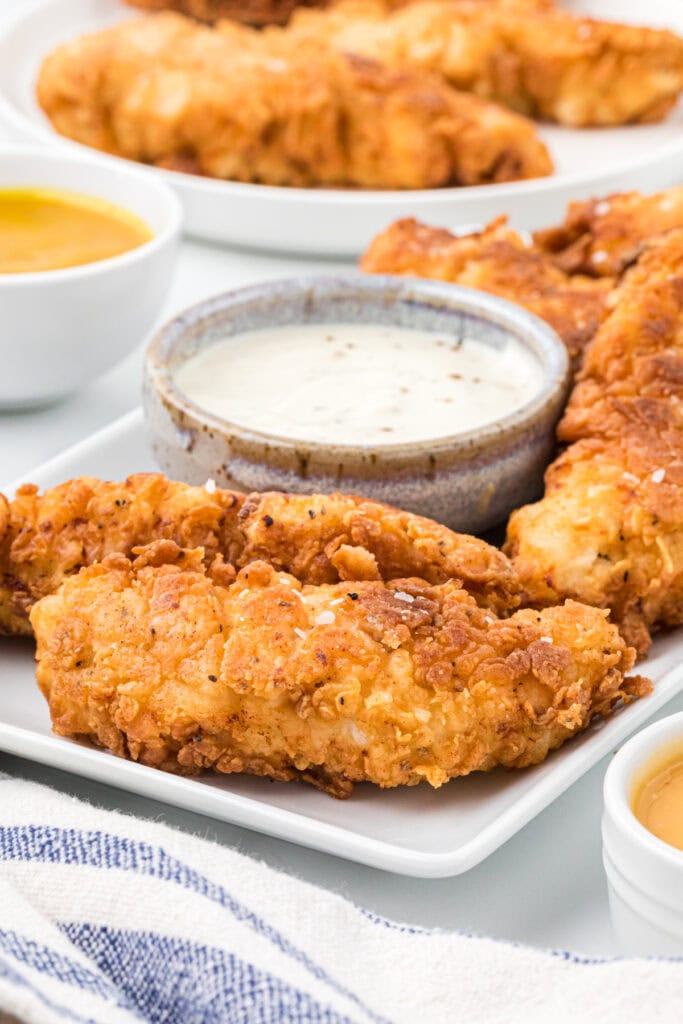
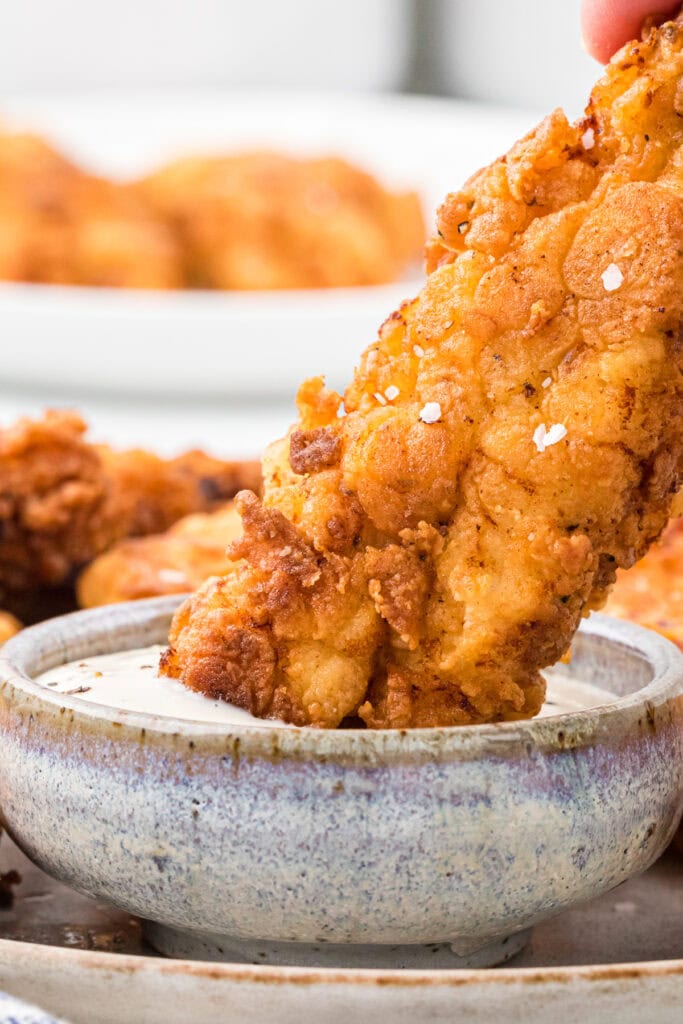
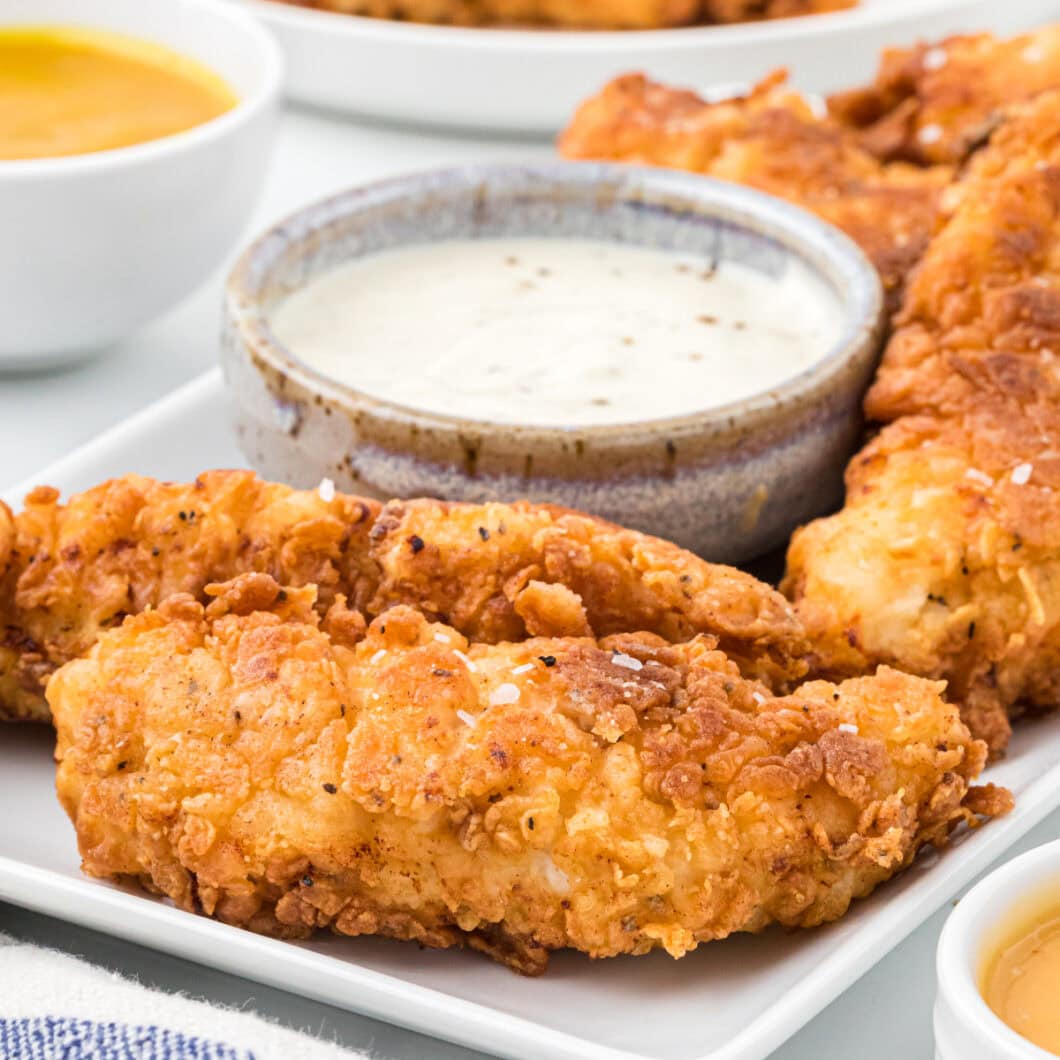
These flavorful Buttermilk Chicken Fingers are golden and crispy on the outside, tender and juicy on the inside, and easy to make at home. A huge kid and crowd-favorite, these taste as good as your favorite drive-through chicken tenders, cook in 6 minutes, and are an easy way to save money by eating a fun meal at home.

What we love about Buttermilk Chicken Tenders
My kids would love to have these tenders on a weekly rotation at our house. We have made these for years. They honestly taste as good as a drive-through fast food restaurant. They are perfectly seasoned, golden, and crispy on the outside and tender and juicy on the inside. They are incredibly addictive, perfect for dunking in your favorite sauces, and are sure to please even your pickiest eater.
I love that these are easy to prepare and cook quickly. I marinate the chicken while I prepare the coating and warm the oil. You can, of course, marinate longer for more flavor and tenderness, up to 24 hours, but I just rarely think of that in time! These cook in 6 minutes and come out so crispy and delicious. This recipe is a great way to save some money by making a fun, kid-friendly food at home.
I always serve these chicken tenders with a variety of sauces for dunking. My kids’ favorites are ranch and Chick-fil-A sauce. You can buy several of their sauces at the grocery store now, which is nice. I usually have a honey mustard or BBQ sauce out as well.
Looking for other recipes that are easy to make at home and save money from eating out? For some other fun family dinners, try our Best Smashburger Recipe, Chicken Fried Steak with White Gravy, Philly Cheesesteak Sliders with Hawaiian Rolls, Buffalo Honey Wings, or Shrimp with Bang Bang Sauce
What you need to make this Chicken Tenders Recipe
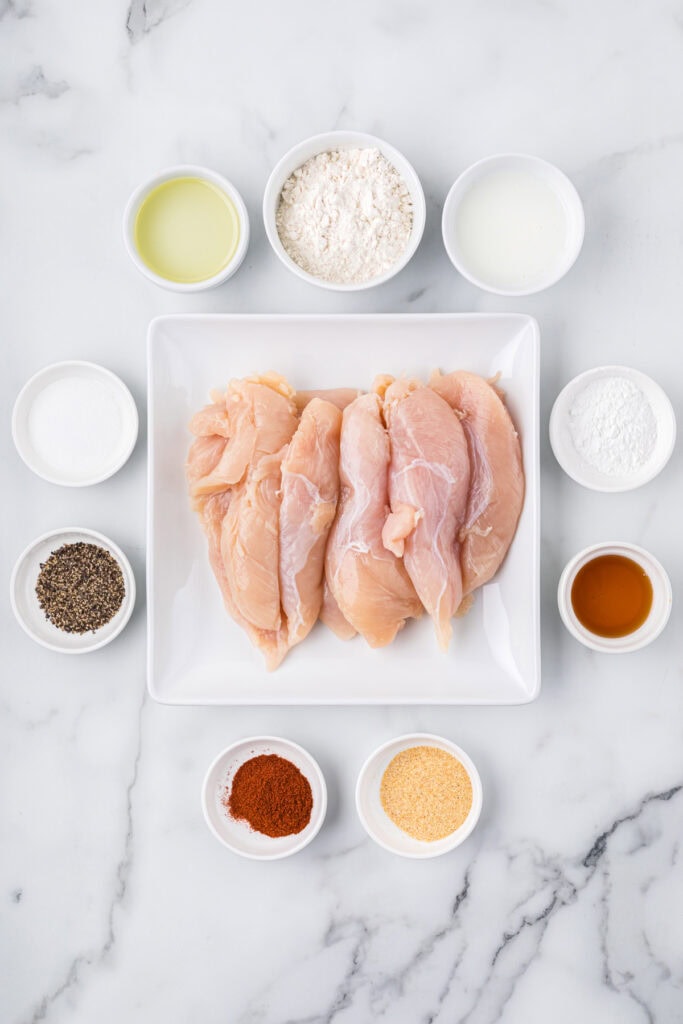
You will need the following ingredients:
- Boneless skinless chicken tenders
- Buttermilk
- Honey
- Salt
- Pepper
- Garlic Powder
- Paprika
- All-purpose flour
- Baking powder
- Cooking oil
- Optional: coarse salt
- Sauces for dipping
Chicken Strips with Buttermilk Substitutions
I know what it’s like when you don’t have everything on hand, and the last thing you want to do is run to the store and pick something up. Here are a few ideas to substitute items on the ingredients list if needed:
- If you don’t have buttermilk, you can substitute it by adding 1 tablespoon of vinegar or lemon to a cup of milk. The flavor is similar, but it won’t be quite as thick and creamy.
- You can use a gluten-free or different flour for the breading. I have used King Arthur’s 1:1 gluten-free flour when needed with great success.
- You can use a variety of cooking oils like canola, peanut, or vegetable oil. I used vegetable oil.
- If you want to add a little heat to your tenders, you could add hot sauce to the buttermilk mixture or cayenne pepper to the buttermilk or flour mixture. You could also use hot honey or buffalo sauce for dipping.
Step-by-step Instructions
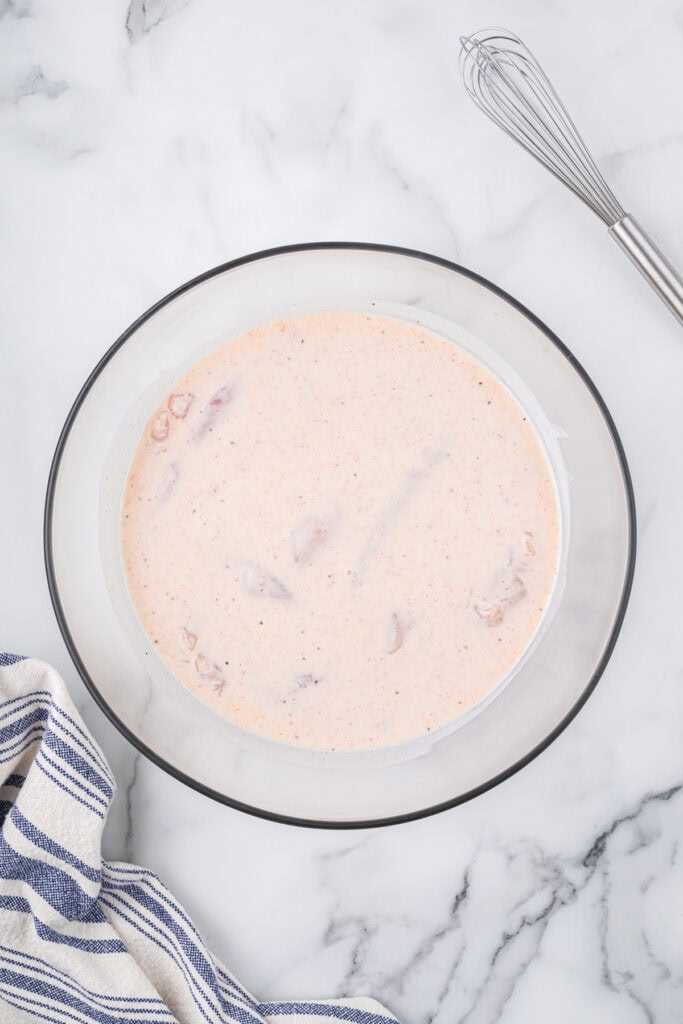
Step 1. n a large bowl, whisk together the buttermilk, honey, 1 teaspoon salt, and ½ teaspoon of pepper, garlic powder, and paprika. Stir in the chicken breast tenders, and with a spatula or spoon, push them into the buttermilk mixture so they are fully covered. Let the chicken marinate for 30 minutes while you prepare the coating and heat the oil.
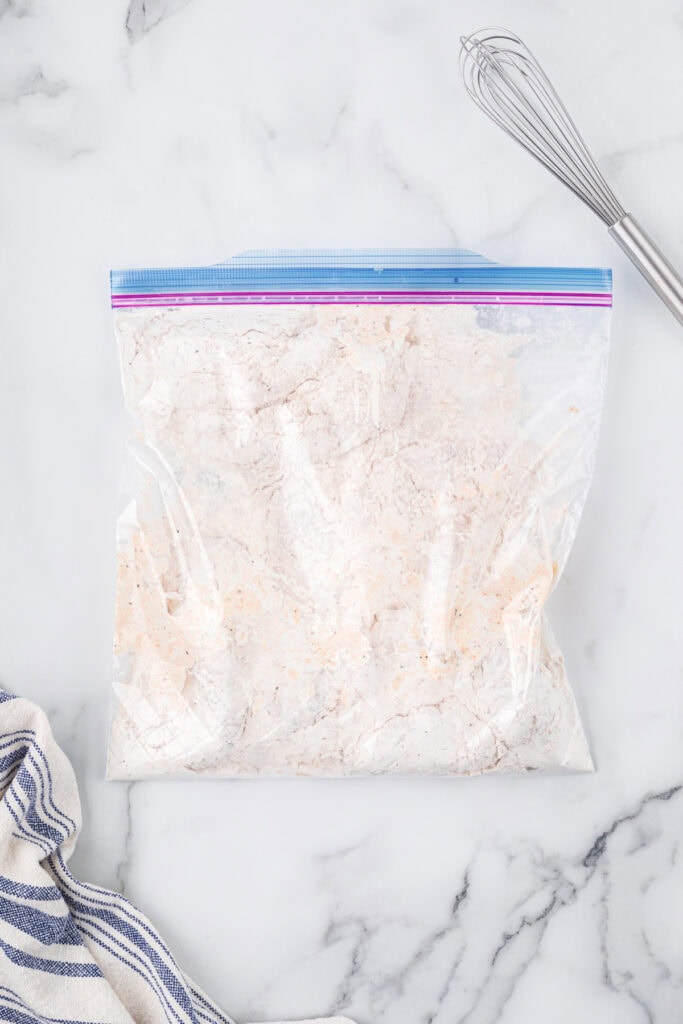
Step 2. In a gallon-size Ziploc bag, pour in the flour, baking powder, 2 teaspoons salt, 1 teaspoon pepper, and ¾ teaspoon of garlic powder and paprika. Seal the bag and shake and squeeze it until the seasonings are evenly distributed. In batches (depending on the size of your skillet), place 4-8 tenders in the flour mixture, seal the bag, and shake the bag, moving the flour mixture around to ensure all the tenders are completely coated.
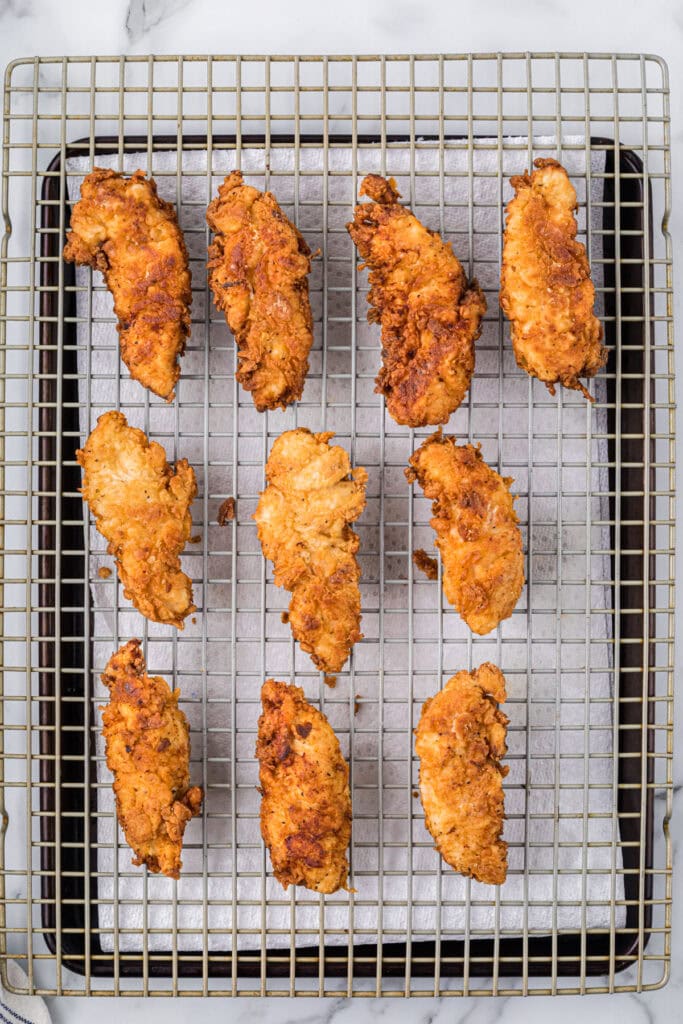

Step 3. Using tongs, carefully place the coated chicken into the hot oil and cook for about 3 minutes on each side until the coating is golden and the temperature of the chicken is 165 degrees Fahrenheit. Using another pair of tongs or a wire mesh skimmer for frying, carefully remove the chicken from the hot oil and set it on the cooling rack resting on the prepared cookie sheet. Repeat the cooking process with the remaining chicken.
Step 4. Sprinkle cooked chicken with a little coarse salt if desired and serve immediately with the sauces of your choice.
Tips

- The buttermilk tenderizes the chicken by breaking down proteins and is an important ingredient in this recipe. It prevents the chicken from getting tough or dry when cooking, it helps the spices penetrate further into the meat, and the thickness of the buttermilk helps the flour adhere to it for the coating.
- When I am batch cooking or cooking a larger amount of protein (like 2 pounds of shrimp), I love using my electric skillet because I can cook more at once. While this recipe would cook well in a cast iron pan, which is great at maintaining an even temperature, or a large heavy bottomed skillet, I always pull out my electric skillet, which heats the oil to temperature and I can cook it in about half the time. I’ve had this electric skillet for almost 10 years now, and I have used it often.
Frequently Asked Questions
| Can Buttermilk Chicken Fingers be made in advance? |
| a. Raw chicken will only stay good in the fridge 1-2 days total. You can marinate the chicken up to 24 hours in advance, which will give the chicken a little more flavor and tenderness. You can also coat the chicken and refrigerate it in advance on a rack uncovered, with the ideal time being 1-4 hours prior to cooking. The coating can adhere to the chicken more strongly and also produce a slightly crisper coating with a little refrigeration before frying. b. These chicken fingers have the best texture and crunch right after cooking. While you can reheat in the oven or air-fryer, I recommend cooking these the day you serve them. |
| How to store chicken tenders? |
| The chicken, once cooled, can be safely stored in the fridge, covered, for 3-4 days, and can be kept in a freezer-safe container in the freezer for about 3-4 months for best quality. Placing a paper towel under the chicken when storing in the fridge can absorb some of the moisture to keep the chicken slightly more crispy. |
| How to reheat Buttermilk Chicken Fingers? |
| For reheating fried food in an oven, place chicken on a wire rack inside a baking sheet in a single layer and reheat in a 400-degree Fahrenheit oven for about 15 minutes. For an air fryer, heat in a 375-degree air fryer and cook for four minutes, turning once. Make sure the chicken is in a single layer. |
| What to serve with chicken tenders? |
| Dipping sauces are a must with honey-mustard, ranch, bbq, buffalo, honey or hot honey, or Chick-fil-A sauces all as possibilities. Fries, mashed potatoes, or coleslaw are often served with chicken tenders. Biscuits, cornbread, sweet potato fries, potato salad, or mac-n-cheese are all other comfort food choices. We often serve with a vegetable side like a side salad, corn, or green beans, and a side of fruit. |
Buttermilk Chicken Fingers
These flavorful Buttermilk Chicken Fingers are golden and crispy on the outside, tender and juicy on the inside, and easy to make at home. A huge kid and crowd-favorite, these taste as good as your favorite drive-through chicken tenders, cook in 6 minutes, and are an easy way to save money by eating a fun meal at home.
35
minutes12
minutes15-16
chicken fingers47
minutesIngredients
2.5 pounds 2.5 boneless skinless chicken breast tenders (tenderloins)
2 cups 2 buttermilk
1 1 ½ tablespoons honey
3 teaspoons 3 salt, divided
1 1/2 teaspoons 1 1/2 coarsely ground pepper, divided
1 1/4 teaspoons 1 1/4 garlic powder, divided
1 1/4 teaspoons 1 1/4 paprika, divided
2 cups 2 flour
2 teaspoons 2 baking powder
4 cups 4 cooking oil for frying
Coarse salt for sprinkling, optional
Dipping sauces of choice (ranch, honey-mustard, Chick-fil-A sauces, bbq sauce, etc.)
Directions
- Line a baking sheet with paper towels, cover the baking sheet with a cooling rack, and set aside.
- In a large bowl, whisk together the buttermilk, honey, 1 teaspoon salt, and ½ teaspoon of pepper, garlic powder, and paprika. Stir in the chicken breast tenders, and with a spatula or spoon, push them into the buttermilk mixture so they are fully covered. Let the chicken marinate for 30 minutes while you prepare the coating and heat the oil.
- In a gallon-size Ziploc bag, pour in the flour, baking powder, 2 teaspoons salt, 1 teaspoon pepper, and ¾ teaspoon of garlic powder and paprika. Seal the bag and shake and squeeze it until the seasonings are evenly distributed.
- In an electric skillet, or large heavy-bottomed skillet, fill the cooking oil so it is about ½ inch high and heat the oil to 350 degrees Fahrenheit over medium-high heat. I use 4 cups of oil in my electric skillet.
- In batches (depending on the size of your skillet), place 4-8 tenders in the flour mixture, seal the bag, and shake the bag, moving the flour mixture around to ensure all the tenders are completely coated.
- Using tongs, carefully place the coated chicken into the hot oil and cook for about 3 minutes on each side until the coating is golden and the temperature of the chicken is 165 degrees Fahrenheit. Using another pair of tongs or a wire mesh skimmer for frying, carefully remove the chicken from the hot oil and set it on the cooling rack resting on the prepared cookie sheet. Repeat the cooking process with the remaining chicken.
- Sprinkle cooked chicken with a little coarse salt if desired and serve immediately with the sauces of your choice.
Notes
- If you want the coating to be extra crunchy, you can double coat it by dipping the chicken in the marinade, then the flour mixture, then again in the marinade, and then a second time in the flour.
- I usually just marinate the chicken for 20-30 minutes. You can, however, marinate the chicken for up to 24 hours for greater flavor and tenderness.
- I always serve these chicken tenders with a variety of sauces for dunking. My kids’ favorites are ranch and Chick-fil-A sauce. You can buy several of their sauces at the grocery store now, which is nice. I usually have a honey mustard or BBQ sauce out as well. If you want to add a little heat, you could use hot honey or buffalo sauce for dipping as well.
- If you have time, you can refrigerate the coated chicken up to 4 hours before cooking. It helps the coating stick to the chicken a little more and can make the chicken crisper. The coating stays on well with the recipe as written, so I rarely do this, but I have before with other recipes and you can.


I am going to try this tonight. We all love chicken fingers!!!
Hope you enjoy them! We have made them so many times over the years, they are a big favorite!
Wow, golden and crispy, I can’t wait to make these at home for my little one.
Thank you so much, hope you enjoy them!
Can you make these in an air fryer?
So we have cooked chicken in our air fryer, but not with this coating. I haven’t recipe tested this recipe in an air fryer, but I don’t think you’ll get the same crispy coating with just the flour. If I were to cook these in the air fryer, I would dry the tenders with a paper towel after marinating, dip in flour, egg, then panko bread crumbs, just make sure to season the panko with at least salt and pepper. Then, spray with oil on both sides and cook at 400 degrees in the air fryer for 10 minutes or so, flipping half way through. Check to make sure with a meat thermometer the chicken is cooked to 165 degrees Fahrenheit.
Thank you! Not big on frying in oil. Just too messy.
I understand. When we use oil, once it is cooled, we use a funnel to pour the oil into a container (like an empty gatorade bottle lying around the house) and dispose of it that way. The clean up using the funnel has been much more manageable, if that helps.
I made these tonight for the family and they were a big hit. The chicken was tender and juicy and delicious! Even better than the chicken fingers we love at our favorite restaurants.
I am so happy to hear that! I’m so glad you enjoyed them, they are a favorite here! Thanks so much for taking time from your busy schedule to leave your feedback!
I love how crispy, yet juicy and tender in the middle, these turned out. They were a hit with the family!
I am glad to hear you enjoyed it! My kids can’t get enough of these. Thanks so much for taking the time to leave your feedback!
These were so crispy and flavorful! I can’t wait to make them again.
Thanks for the great feedback! My kids can’t get enough of these and they are so yummy with your favorite sauces. I’m so glad you enjoyed them!
Wow, these look incredible. I cannot wait to make them.
Thank you, hope you enjoy them! They are a big family favorite here