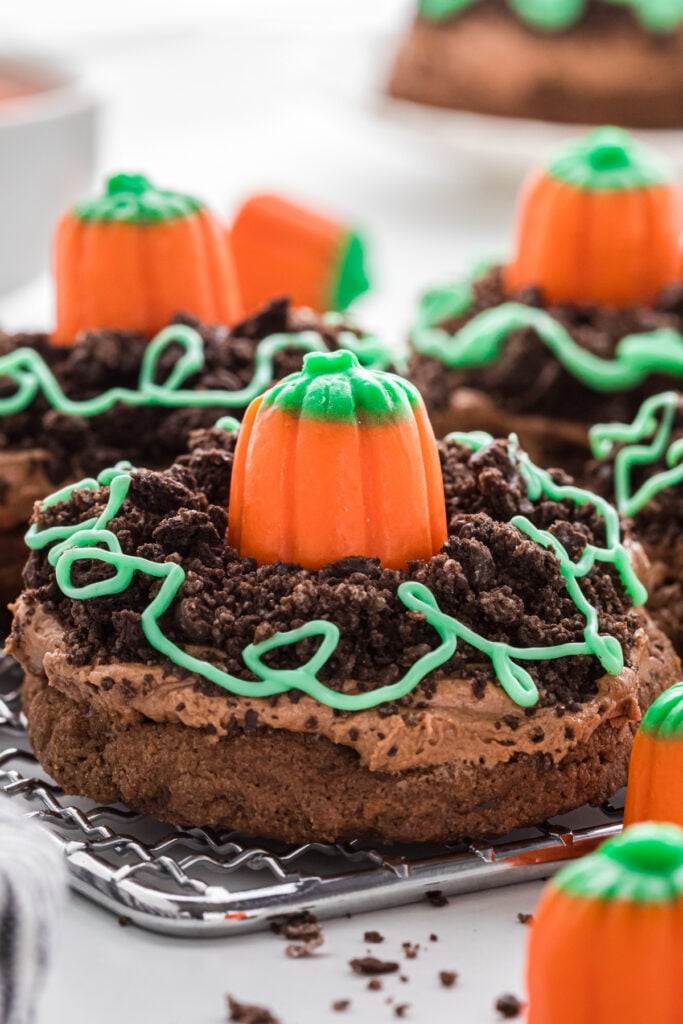
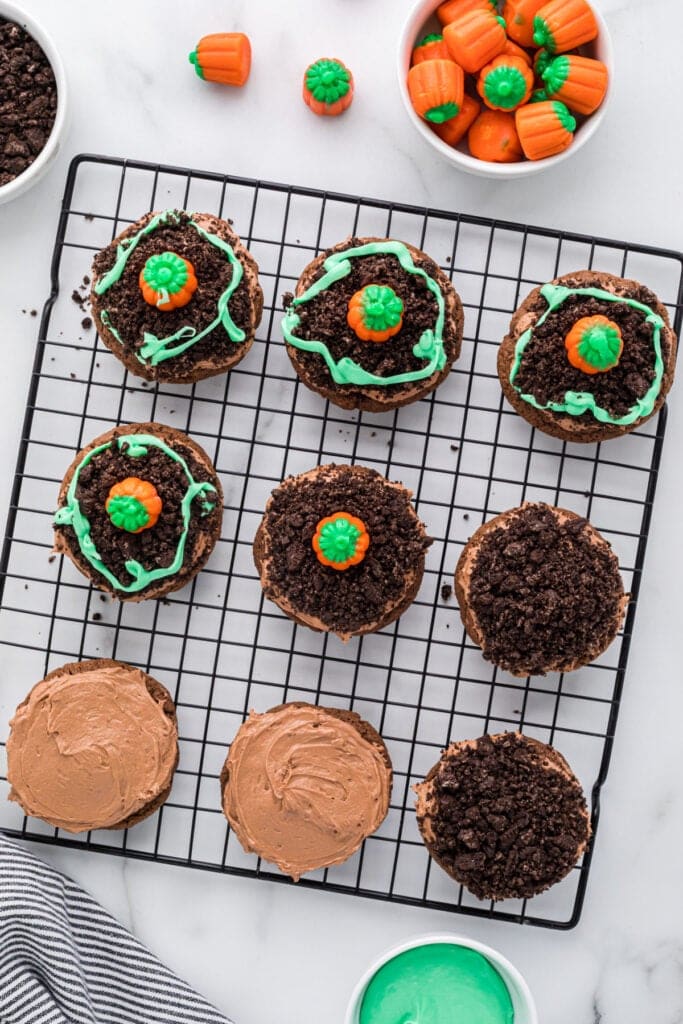
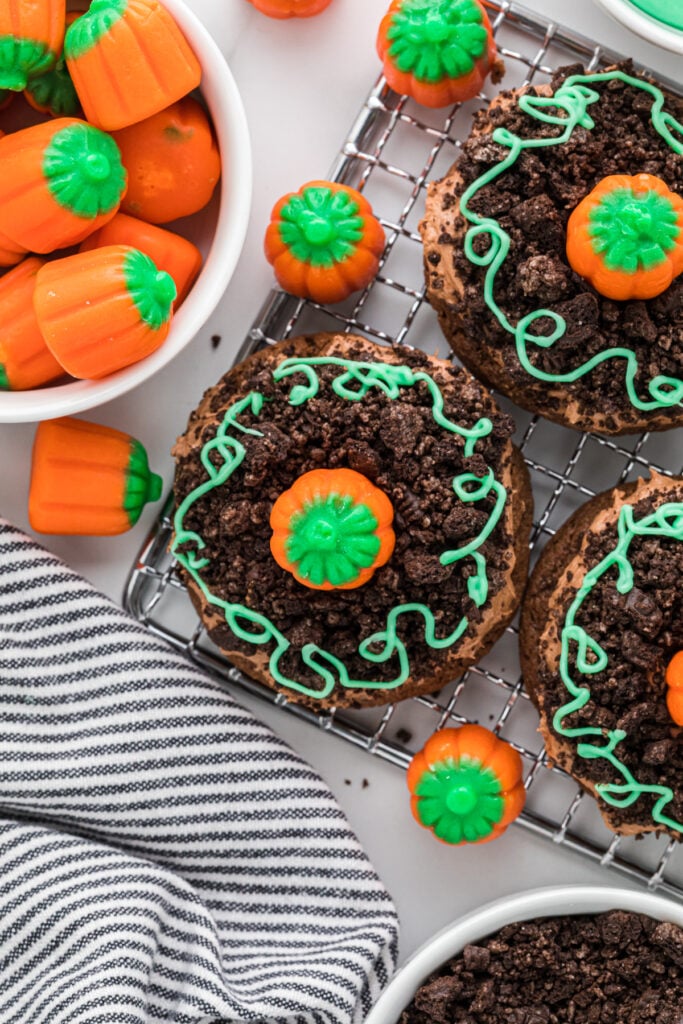
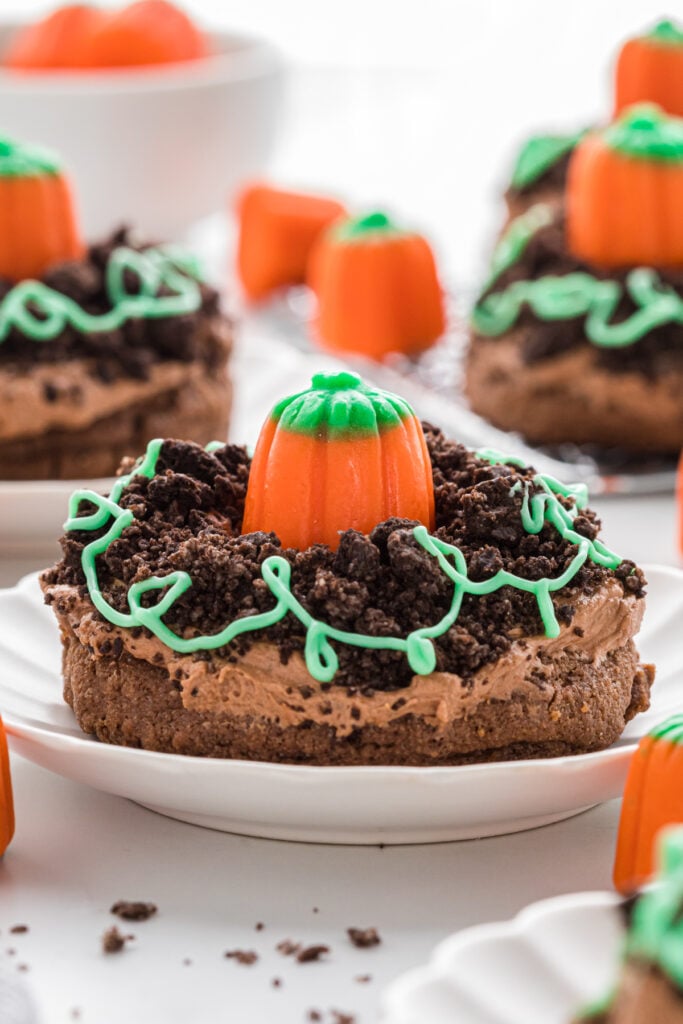
These Pumpkin Patch Cookies are a fun fall favorite. Made with our Chocolate Frosted Cookies, Oreo cookie crumbs, candy pumpkins, and white chocolate vines, they are cute little mini pumpkin patch treats. Kids love both making and eating them, and they are fun to share with friends, classmates, or at Halloween and fall parties.
What we love about these Pumpkin Patch Cookies
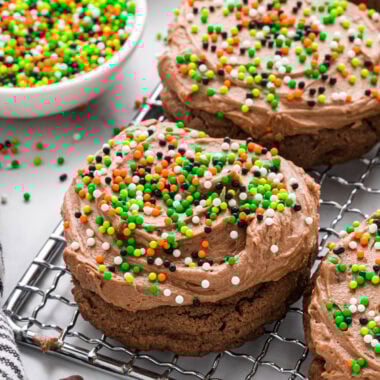
I love that these cookies are fun to make and eat. It’s pure chocolate heaven with the chocolate chocolate chip cookie base, chocolate frosting, and Oreo cookie crumbs. Our Chocolate Frosted Cookies are the base recipe for these cookies. We love our from-scratch chocolate frosting with these cookies, but these are easily simplified using a can of frosting from the store.
Kids love helping with sprinkling the Oreos and placing the pumpkins on. When applying the “vines”, I just put the green-tinted melted white chocolate in a ziploc bag, cut a small hole, and squeeze to decorate, which kids can enjoy doing as well.
These cookies are fun to share for Halloween and fall events. They are a perfect choice to share with friends and classmates, or to serve at parties and special holiday meals. We like adding these to a fall or Halloween charcuterie board for a special treat as well.
Looking for other cookie recipes? Try our Pumpkin Spice Cookies with Cream Cheese Frosting, Chocolate Chip Pretzel Cookies, or our Chocolate Chip and White Chocolate Chip Cookies.
What you need to make these Pumpkin Halloween Cookies
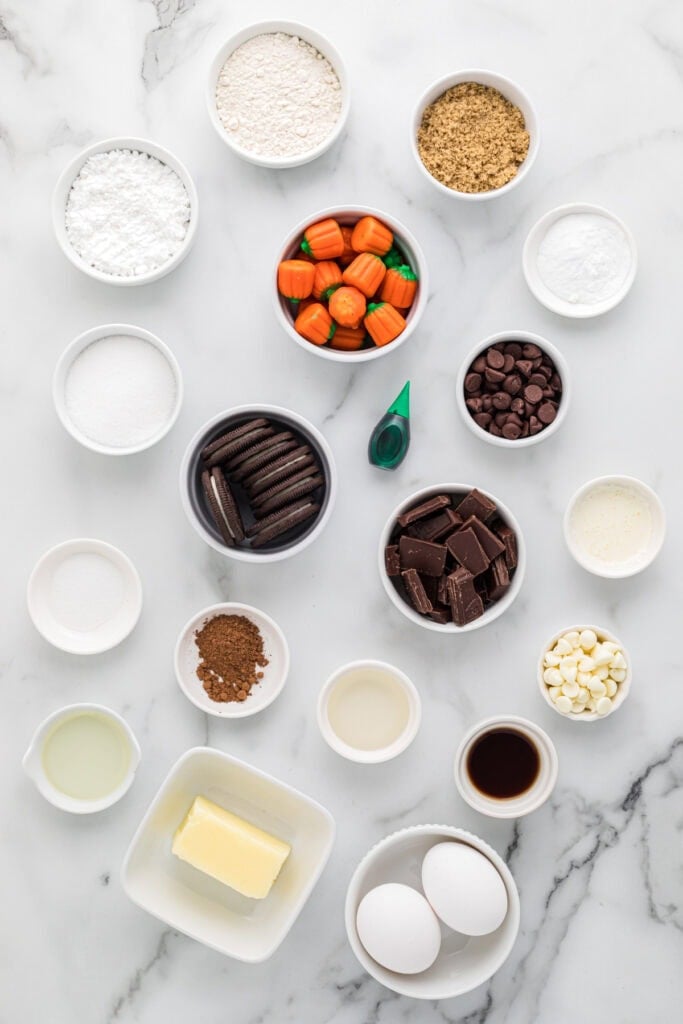
You will need the following ingredients:
- All-purpose flour
- Cocoa powder
- Baking soda
- Salt
- Granulated sugar
- Brown sugar
- Butter
- Eggs
- Vanilla
- Semi-sweet chocolate chips
- Can of store-bought chocolate frosting if not making frosting recipe
- Optional: Semi-sweet chocolate baking bar, chopped
- Optional: Powdered sugar
- Optional: Light corn syrup
- Optional: Cream
- Oreos
- Mellowcreme Pumpkins candy
- White chocolate chips
- Vegetable oil or shortening
- Green food coloring
Pumpkin Patch Cookies Substitutions
I know what it’s like when you don’t have everything on hand, and the last thing you want to do is run to the store and pick something up. Here are a few ideas to substitute items on the ingredients list if needed:
- You could use store-bought chocolate frosting if you don’t want to make your own.
- You can omit the chocolate chips in the cookies if desired.
- You could use half-and-half or milk in place of the cream in the frosting.
- If you don’t want to use the light corn syrup (I used Karo brand), you could omit it, but the taste and texture will be different.
- Instead of using the melted white chocolate and green food coloring, you could also buy green cookie icing at the store.
Step-by-step Instructions
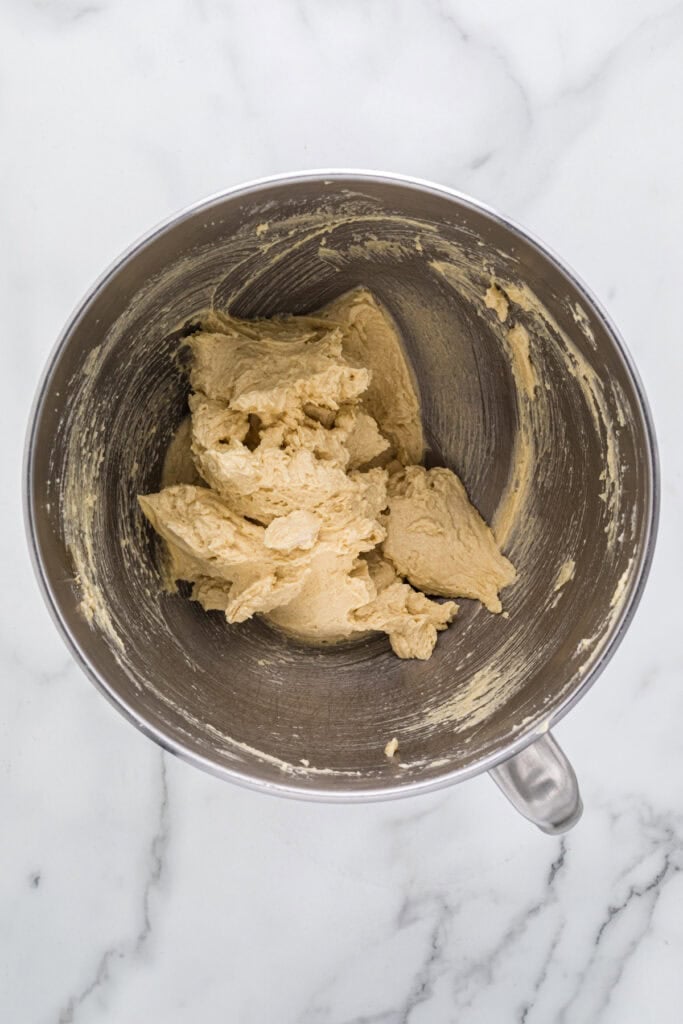
Step 1. Using an electric hand-held mixer or a stand mixer, at medium speed, beat together the sugars and butter until light and fluffy, about 2-3 minutes. Scrape down the sides of the mixer. Add the egg, egg yolk, and vanilla and beat again until thoroughly mixed.
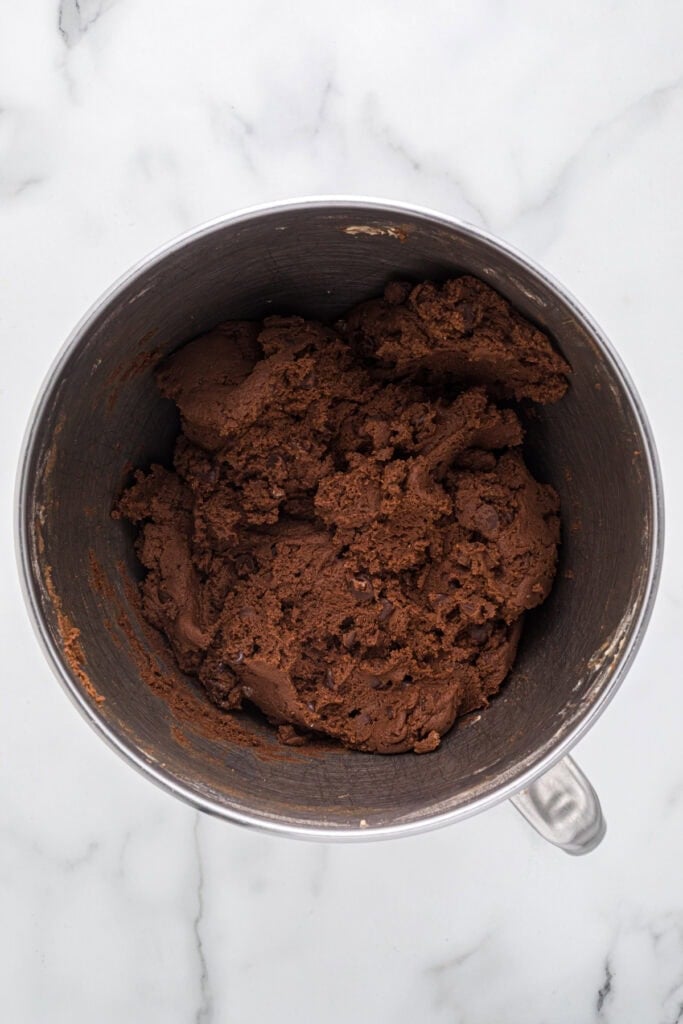
Step 2. Add the flour mixture to the sugar mixture and mix at low speed just until combined, being careful not to overmix. Scrape down the sides of the mixture to make sure all ingredients are incorporated. Stir in the chocolate chips. The dough will be stiff.
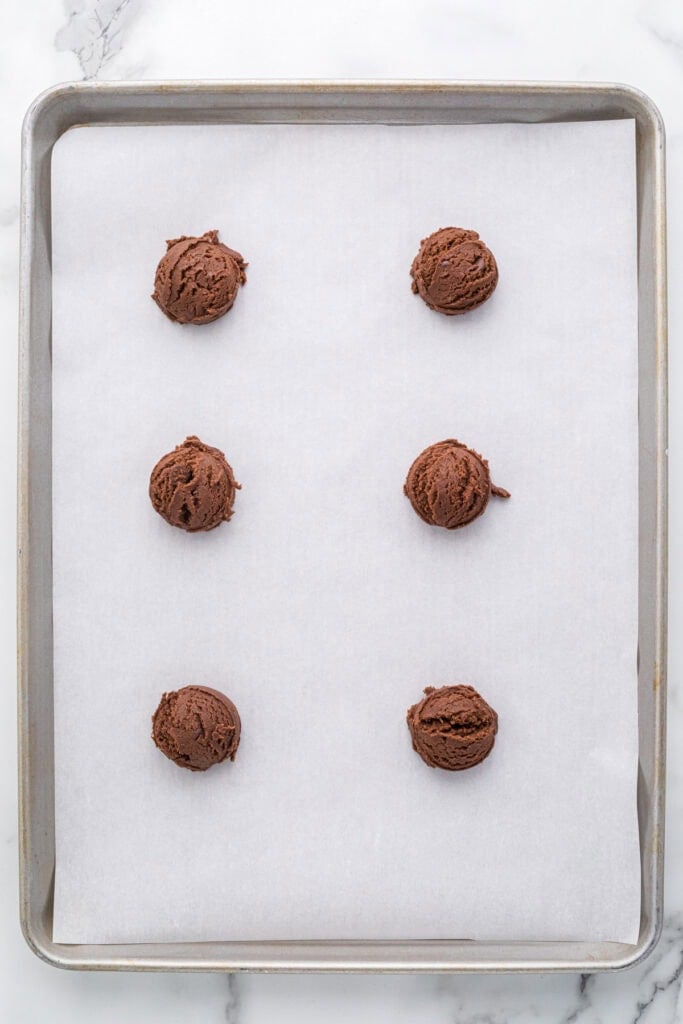
Step 3. Using a medium cookie scoop (about 2 tablespoons), scoop the dough onto the prepared cookie sheet and space the dough 2 inches apart. Bake the cookies for 8-10 minutes, until the bottoms of the cookies are just turning golden brown. Leave the cookies on the cookie sheet to cool for 2-5 minutes, then remove to a cooling rack to cool completely.
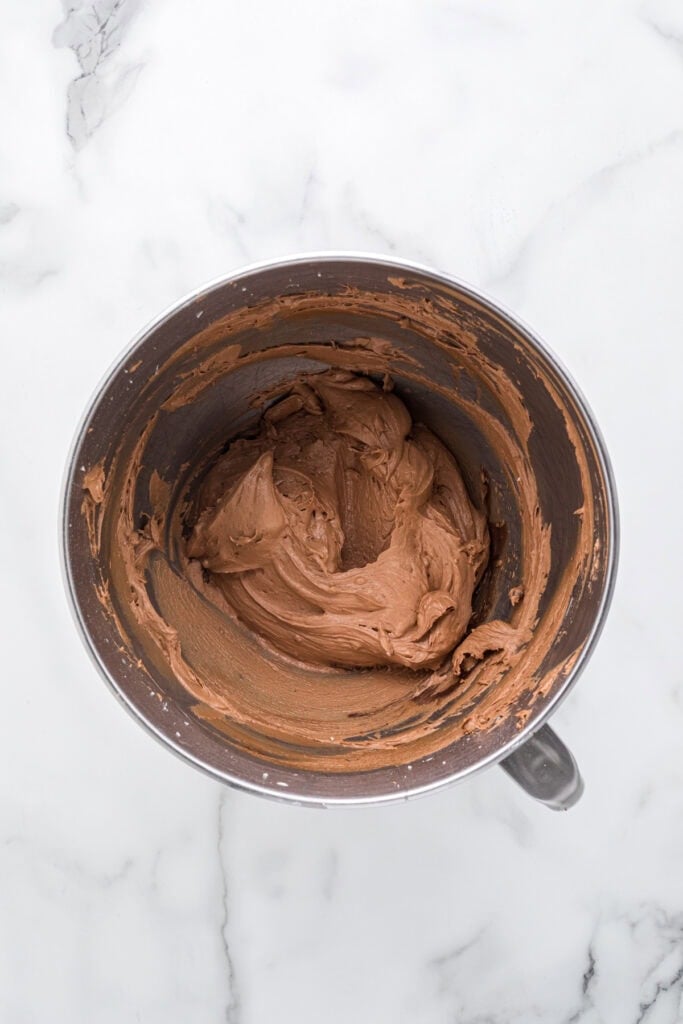
Step 4. If making homemade frosting, beat together the powdered sugar, butter, and salt until light and fluffy, about 2-3 minutes. Scrape down the sides of the mixer. Add the corn syrup, cream, and vanilla and beat again until thoroughly mixed. Add the melted chocolate and beat until thoroughly incorporated and the frosting is all the same color.
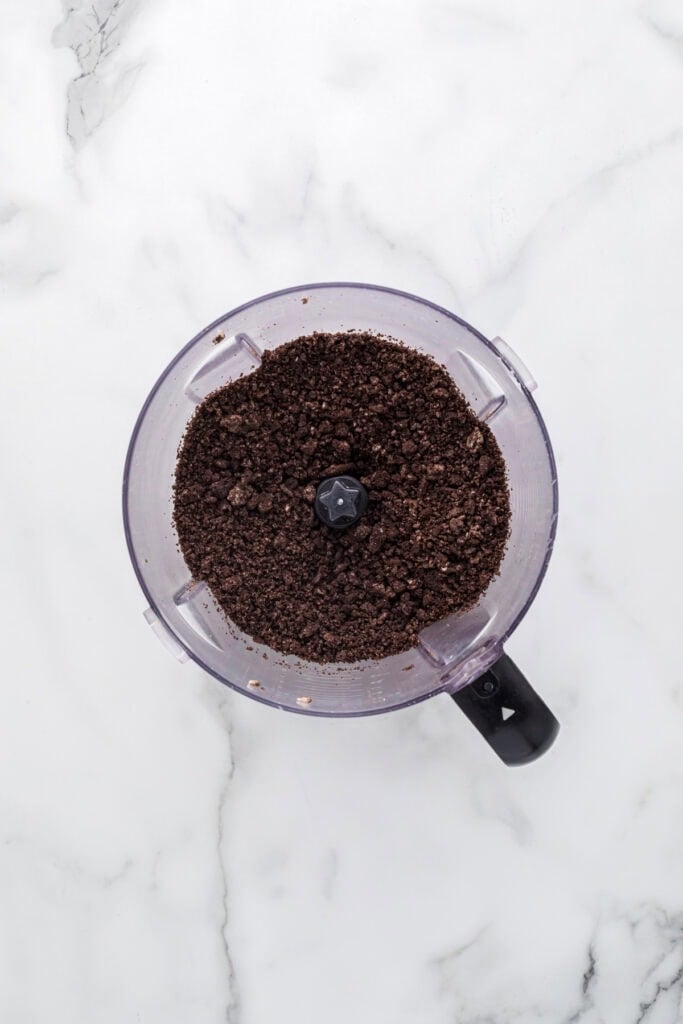
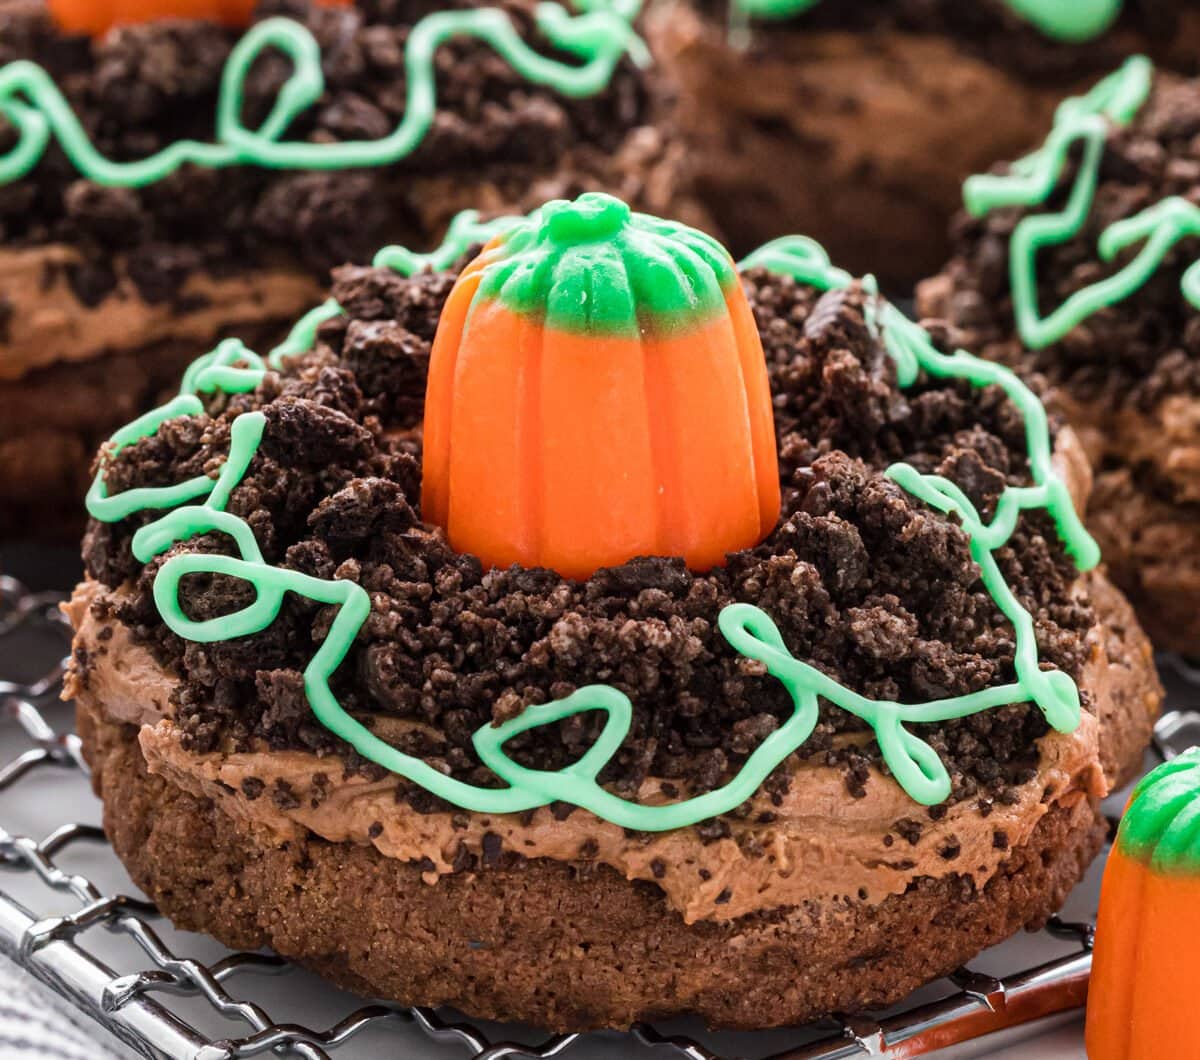
Step 5. Crush the Oreos in a food processor or by smashing them in a Ziploc bag with a rolling pin. Sprinkle the crushed Oreos over the frosted cookies and add a pumpkin candy in the center of each cookie.
Step 6. In a medium-sized microwaveable bowl, melt the white chocolate chips with the vegetable oil in 15-second intervals, stirring to help the white chocolate melt with each 15-second interval. Add several drops of green food coloring and stir until the food coloring is completely incorporated with the frosting. Place the white chocolate in a Ziploc bag and cut just the tip of one corner of the bag to allow the chocolate to come out. Pipe swirly vines around the cookies.
Tips

- I recommend keeping parchment paper on hand; it is especially helpful when baking cookies. Lining your pan with parchment paper helps prevent cookies from spreading when baking, which in turn helps prevent your cookies from becoming too thin and crispy. The cookies won’t stick to your pan, and pans are much easier to clean up. Also, the parchment paper creates a thin layer between the cookies and the pan, which helps promote even browning and prevents hot spots on your pan that may cause cookies to burn.
- I love using a cookie scoop when making cookies so that the cookies are a uniform size and shape. I use a medium cookie scoop for this recipe, which makes a scoop of about 2 tablespoons. I really like the one from Pampered Chef or this scoop from Amazon works great as well.
- Also, I love my USA pan baking sheets, they cook so evenly, are high quality, and long-lasting.
Frequently Asked Questions
| Can the cookie dough and frosting be made in advance? |
| a. The USDA says that cookie dough is safe in the fridge for 2-4 days. You can make the dough the day before, cover the dough in the fridge, and bake the cookies the next day. Before baking, keep the dough out at room temperature for about 30 minutes, or the dough will be hard to scoop and won’t spread much when baking. b. You can also freeze cookie dough. Scoop them into 2 2-tablespoon portions and place them individually on a cookie sheet to freeze. Once frozen, they can be frozen in a sealed bag or container for up to 2 months. To thaw, set them on a cookie sheet ready to bake and let them sit at room temperature for 15-30 minutes while the oven preheats. I recommend cooking them at a lower temperature, 350 degrees Fahrenheit, and then baking them for a little longer, 10-12 minutes, keeping an eye on them. c. Ideally, I think it is best to frost the cookies right when you make the frosting for the ease of frosting the cookies and the best texture. You can, however, refrigerate or freeze the homemade frosting in an air-tight container. I would bring it to room temperature and rewhip if necessary before frosting. If frozen, thaw it in the fridge first. The frosting would last a few days in the fridge and 2-3 months in the freezer. If freezing the frosting, cover it first with plastic wrap to remove any air before placing it in an airtight container. |
| How to store Chocolate Frosted Cookies? |
| a. Store frosted cookies in an air-tight container in a single layer in the fridge. I put parchment paper or waxed paper between layers of cookies if needed. They will last in the fridge for 1-2 weeks, or in the freezer for 3 months. b. Store unfrosted cookies in an air-tight container at room temperature for 3-5 days. Sometimes I make the cookies and store them, then frost them the next day. They can also be stored in an air-tight container in the fridge for 1-2 weeks, or in the freezer for 3 months. |
Pumpkin Patch Cookies
33
cookies50
minutes40
minutes1
hour30
minutesThese Pumpkin Patch Cookies are a fun fall favorite. Made with our Chocolate Frosted Cookies, Oreo cookie crumbs, candy pumpkins, and white chocolate vines, they are cute little mini pumpkin patch treats. Kids love both making and eating them, and they are fun to share with friends, classmates, or at Halloween and fall parties.
Ingredients
Cookies:
2 1/4 cups all-purpose flour
1/2 cup cocoa powder
1 teaspoon baking soda
1/2 teaspoon salt
¾ cup granulated sugar
¾ cup brown sugar, packed
1 cup butter (2 sticks), softened
1 egg, plus 1 egg yolk
1 ½ teaspoons vanilla
1 1/2 cups semi-sweet chocolate chips
Optional Chocolate Frosting (or use a can of store-bought frosting):
4 -ounce semi-sweet chocolate baking bar, chopped (I like Ghirardelli’s brand)
1 ½ cups powdered sugar
½ cup (1 stick) butter, softened
Pinch of salt
2 tablespoons corn syrup
2 tablespoons cream
1 teaspoon vanilla
Pumpkin Patch Topping:
11 -ounce bag Mellowcreme Pumpkins candy
2 cups crushed Oreos
2 cups white chocolate chips
2 tablespoons vegetable oil
Green food coloring
Directions
- Preheat the oven to 375 degrees Fahrenheit.
- Line a baking sheet with parchment paper.
- In a medium-sized bowl, whisk together the flour, cocoa powder, baking soda, and salt. Set aside.
- Using an electric hand-held mixer or a stand mixer, at medium speed, beat together the sugars and butter until light and fluffy, about 2-3 minutes. Scrape down the sides of the mixer. Add the egg, egg yolk, and vanilla and beat again until thoroughly mixed.
- Add the flour mixture to the sugar mixture and mix at low speed just until combined, being careful not to overmix. Scrape down the sides of the mixture to make sure all ingredients are incorporated.
- Stir in the chocolate chips. The dough will be stiff.
- Using a medium cookie scoop (about 2 tablespoons), scoop the dough onto the prepared cookie sheet and space the dough 2 inches apart.
- Bake the cookies for 8-10 minutes, until the bottoms of the cookies are just turning golden brown. Leave the cookies on the cookie sheet to cool for 2-5 minutes, then remove to a cooling rack to cool completely.
- Frost the cookies with the chocolate frosting (using a can of chocolate frosting or my optional homemade frosting below). I like to use an offset spatula to frost the cookies. I place the frosting on the cookie, place the spatula on the frosting, and turn it in a circle to create a swirl in the frosting, continuing to turn as necessary and adding additional frosting if necessary for the desired swirled look.
- Sprinkle the crushed Oreos over the frosted cookies. Add a pumpkin candy in the center of each cookie.
- In a medium-sized microwaveable bowl, melt the white chocolate chips with the vegetable oil in 15-second intervals, stirring to help the white chocolate melt with each 15-second interval. Add several drops of green food coloring and stir until the food coloring is completely incorporated with the frosting.
- Place the melted white chocolate in a Ziploc bag and cut just the tip of one corner of the bag to allow the chocolate to come out. Pipe swirly vines around the cookies. You may need more than one Ziploc bag. If the frosting starts to harden from sitting too long, you will need to remove it from the bag to gently reheat it in the microwave for a few seconds and start again.
- Optional Homemade Chocolate Frosting Directions:
- In a medium microwave-safe dish, melt the semi-sweet chocolate in 15-second intervals, stirring to help the chocolate melt with each 15-second interval.
- Using an electric hand-held mixer or a stand mixer, at medium speed, beat together the powdered sugar, butter, and salt until light and fluffy, about 2-3 minutes. Scrape down the sides of the mixer. Add the corn syrup, cream, and vanilla and beat again until thoroughly mixed.
- Add the melted chocolate and beat until thoroughly incorporated and the frosting is all the same color. Scrape down the sides of the mixer to make sure all the frosting is mixed in thoroughly.
Notes
- After placing the melted white chocolate in the Ziploc bag for piping, I try and cut the smallest hole that I can from the corner of the bag before piping the vines. A larger hole makes a larger vine that is a little harder to swirl.
- The “vines” will harden once they are at room temperature or are refrigerated. Take care when transferring them to serve or store, as the vines can be brittle and break.
- Sprinkling the Oreo cookie crumbs is a messy job. I place my frosted cookies on a cooling rack and parchment paper under the cooling rack for easier cleanup. Also, take care when transferring them to store or serve, as the Oreo crumbs can spill a little off the sides.
- To measure your flour, spoon the flour into a dry measuring cup and level off the top using a knife or straight-edged utensil for best results.
- To make your cookies in the best circular shape, right when you pull them from the oven, put a glass cup or a 2.5 to 3-inch circle cookie cutter around a cookie and gently move the cookie cutter around in a circular shape to help nudge the edges to make a more perfect circle.


These are so cute! I’m going to bookmark for my Halloween baking – thanks for sharing.
I am so glad you like them! Hope you enjoy them! They really are a fun and delicious Halloween treat.
Not only do these cookies look fun and cute but they tasted amazing too.
I love hearing that, thanks for letting me know you enjoyed them! I love the chocolate base and Oreo crumb, and they really are fun for the fall.
These Pumpkin Patch Cookies look adorable, I’m planning to make them this weekend for our Halloween party!
Thank you so much! I hope you enjoy them! They are fun to make and so delicious!
Oh my goodness, these are SO cute. I love them so much. Definitely making these for my kids class!
Thank you so much! Hope you enjoy them! They are such a kid favorite, and delicious too!
These are absolutely adorable! Such a creative way to make a festive fall treat, and I love that kids can help too. Perfect little bites for parties or school gatherings!
Thank you! I appreciate your feedback! They really are super cute for fall. Kids love them and they taste great!
Not only were these delicious, they were so stinking cute! Loved how easy the recipe was to follow.
Thanks so much for letting me know you liked them! They really are fun, and I love the chocolate flavors from the cookies, frosting, and Oreo crumbs. Thank you!
These were a total hit! Thank you!
I’m so glad you enjoyed them! Thanks for sharing your feedback! It really is a fun cookie for the fall.